
ADVERTISEMENT
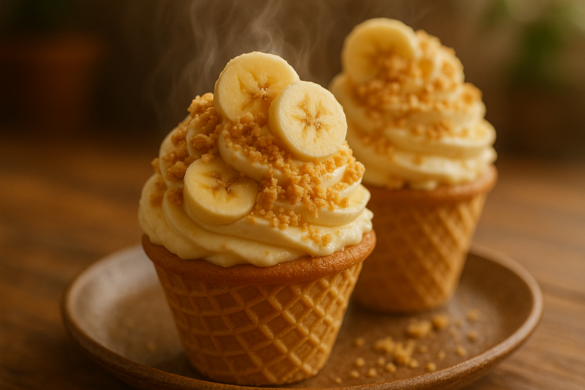
Who says you can’t have your pudding and eat it too? These Banana Pudding Cheesecake Cones are a perfect blend of creamy banana pudding, rich cheesecake filling, and crunchy waffle cones layered with sweet banana slices and vanilla wafer crunch. Light, fluffy, and perfectly indulgent, these cones are the ultimate handheld dessert that’s as fun to eat as they are delicious!
If you love banana desserts but want something a little more portable and eye-catching than the usual, this recipe is for you. It’s great for summer parties, family gatherings, or just a special treat when you want to impress with minimal effort. Ready to wow your guests with a handheld dessert that looks gourmet but comes together in minutes? Let’s get started!
What Are Banana Pudding Cheesecake Cones?
Imagine all your favorite banana pudding flavors wrapped up in a crunchy waffle cone that’s what these cheesecake cones deliver. Instead of traditional bowls or trifle dishes, the pudding and cheesecake filling are layered inside crisp cones, making them perfect for on-the-go snacking or festive parties. The combination of creamy textures with crunchy vanilla wafer bits and fresh banana slices creates a delightful flavor explosion with every bite.
Why You’ll Love Banana Pudding Cheesecake Cones
There are so many reasons to add these cones to your dessert lineup. First off, the convenience no plates or spoons needed, just grab and enjoy! The mix of textures is unbeatable: crunchy cones, silky cheesecake filling, smooth pudding, and soft banana slices. Plus, they’re customizable add nuts, chocolate chips, or even caramel drizzle for extra flair.
Best of all, this recipe is super simple and quick. It uses easy pantry staples like instant pudding and whipped topping, so you don’t need to fuss with complicated baking. If you’re a fan of creamy no-bake desserts like banana cream pie or classic cheesecake, these cones will definitely become a favorite.
How to Make Banana Pudding Cheesecake Cones
Quick Overview
These cones come together in just a few simple steps. You start by making a smooth banana pudding base, then whip up a rich cheesecake filling. Layer both inside crunchy waffle cones along with banana slices and vanilla wafer crumbs. After a short chill in the fridge, they’re ready to serve light, fluffy, and perfectly indulgent.
Ingredients
For the Base:
- 6 waffle cones
- 1 (3.4 oz) box instant banana cream pudding mix
- 1½ cups cold milk
For the Cheesecake Filling:
- 1 (8 oz) package cream cheese, softened
- 1 cup powdered sugar
- 1 teaspoon vanilla extract
- 1½ cups whipped topping (like Cool Whip)
For Layering:
- 1 cup crushed vanilla wafer cookies
- 2 bananas, sliced
For Garnish:
- Additional whipped topping and crushed wafers
Step-by-Step Instructions:
Step 1: Prepare the Pudding
In a mixing bowl, whisk the instant banana pudding mix with cold milk until smooth and slightly thickened. Let it chill for about 5 minutes while you prepare the other components.
Step 2: Make the Cheesecake Filling
In a separate bowl, beat the softened cream cheese until smooth and creamy. Add powdered sugar and vanilla extract, mixing until fully combined.
Step 3: Combine Mixtures
Gently fold the banana pudding into the cream cheese mixture. Then fold in the whipped topping until the filling is smooth, light, and fluffy.
Step 4: Layer the Cones
Spoon or pipe a layer of cheesecake filling into the bottom of each waffle cone. Add a few banana slices and sprinkle with crushed vanilla wafer cookies.
Step 5: Repeat Layers
Add another layer of filling, followed by more banana slices and wafer crumbs. Fill each cone generously to the top.
Step 6: Garnish
Top each cone with a dollop of whipped topping and sprinkle with crushed vanilla wafers for an irresistible finish.
Step 7: Chill Before Serving
Refrigerate the cones for at least 30 minutes before serving to allow the flavors to meld and the filling to set perfectly.
How to Serve Banana Pudding Cheesecake Cones
These cones are a showstopper on their own, but you can elevate the experience even more. Serve them at summer picnics, kids’ parties, or casual get-togethers. Pair with:
- A side of fresh berries or sliced strawberries for a fruity contrast
- A cold glass of milk or creamy iced coffee
- A scoop of vanilla or banana ice cream for extra indulgence
They’re easy to grab and go, making them ideal for outdoor entertaining or just a sweet snack anytime.
Pro Tips for Perfect Banana Pudding Cheesecake Cones
- Use very soft cream cheese to ensure a smooth, lump-free filling.
- If you want a tangier twist, try adding a tablespoon of fresh lemon juice or zest.
- For extra crunch, toast the vanilla wafers before crushing.
- Don’t overfill the cones to avoid spills layer carefully and evenly.
- Customize by adding chopped nuts, mini chocolate chips, or a drizzle of caramel sauce on top.
Storing and Serving Tips
Keep any leftover cones covered in the refrigerator for up to 2 days. Because of the crunchy cones, they’re best enjoyed within the first day before the cones soften too much. Avoid freezing, as it may change the texture of the pudding and cheesecake filling. If serving later, keep chilled until ready to eat for the freshest taste.
Frequently Asked Questions
Can I prepare these cones ahead of time?
Yes! Make them a few hours ahead, cover, and refrigerate. Just add the garnish right before serving for best presentation.
Can I substitute the whipped topping with homemade whipped cream?
Absolutely! Freshly whipped cream adds a lighter, fresher texture that pairs beautifully with the cheesecake filling.
Are these cones suitable for kids?
Definitely! They’re fun to eat and made with simple, kid-friendly ingredients.
Can I use other pudding flavors?
Sure! Chocolate or vanilla pudding would work well if you want to switch things up.
Conclusion
Banana Pudding Cheesecake Cones are the perfect dessert for anyone who loves creamy, fruity, and crunchy textures all in one bite. Easy to make and fun to serve, they’re a guaranteed crowd-pleaser for any occasion. Whether it’s a birthday party, picnic, or just a sweet treat after dinner, these cones bring all the flavor with none of the fuss. Try this recipe today and bring a little handheld happiness to your dessert table!
Have you made these cones before? Drop a comment below and share your favorite topping ideas! Happy dessert making!
ADVERTISEMENT